 Sky Simulator setup
Instruction for several image aquisition programs how to use the Sky Simulator.
Feedback, comments, additions please contact via this forum or email

Index:
- Setting up the simulator
- APT
- CCDCiel
- Nina
- Preparation for programs which does not support Alpaca but only ASCOM like PHD2 (Building ASCOM to ALPACA bridge)
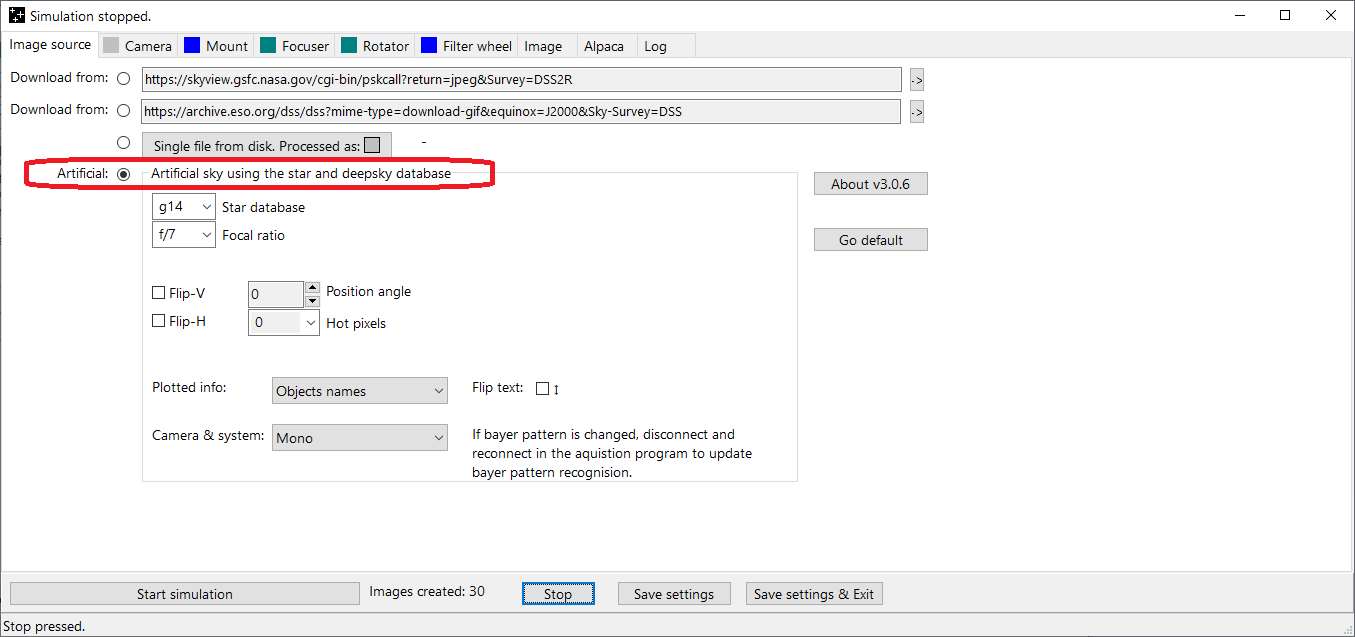
In tab Image source, select Artificial:
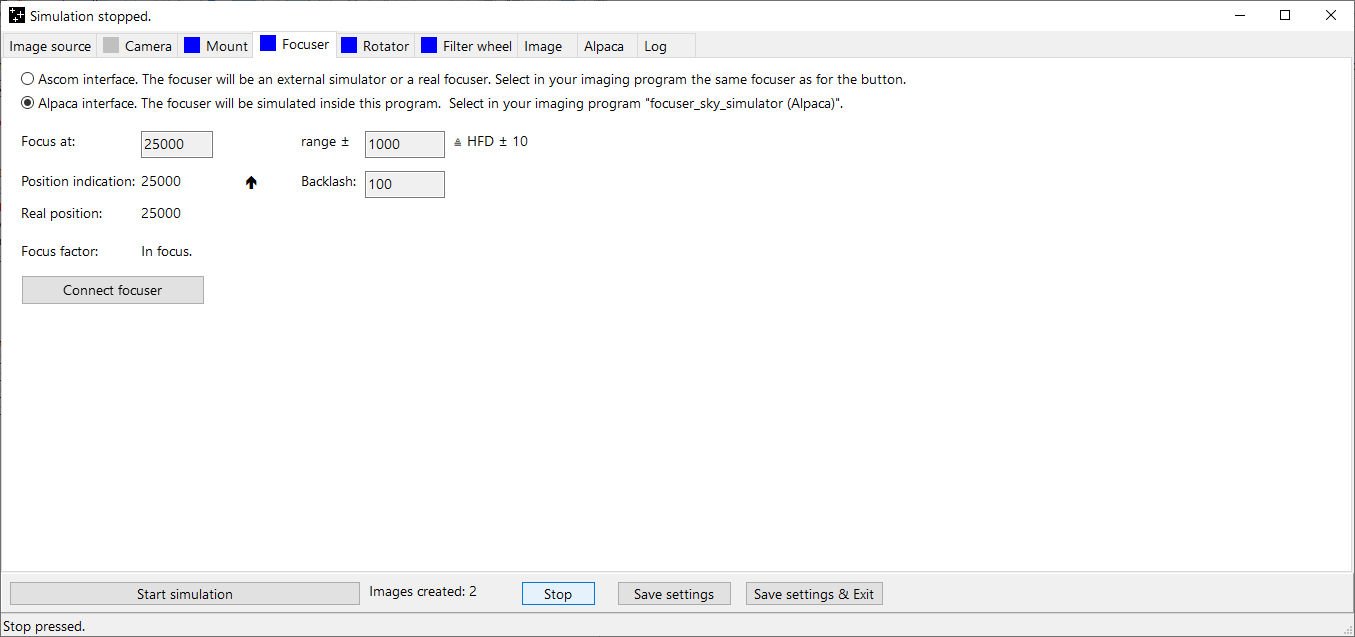
In tab Focuser, select mode ALPACA (or select ASCOM and select the ASCOM simulator). Select later the same focuser in the acquisition program
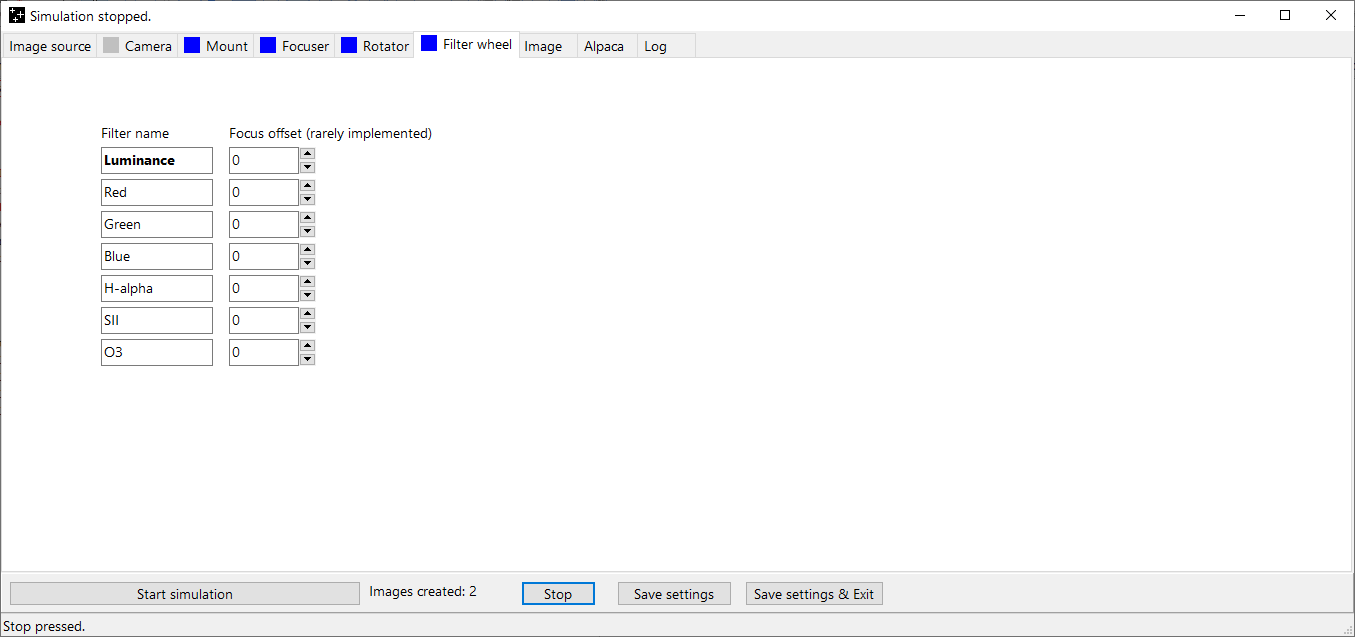
The internal filter wheel is only accesible via ALPACA (or select ASCOM and select the ASCOM simulator). A bridge ASCOM to ALPACA can be created in tab Camera.
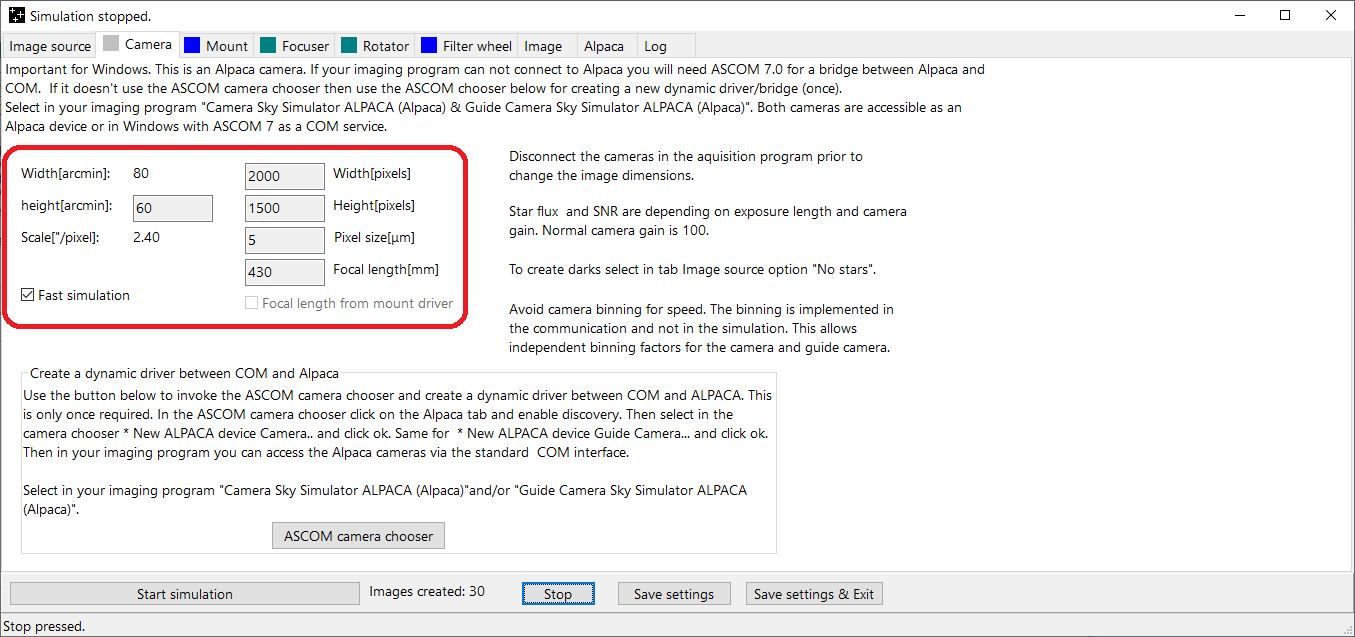
Set in tab Camera the following settings:
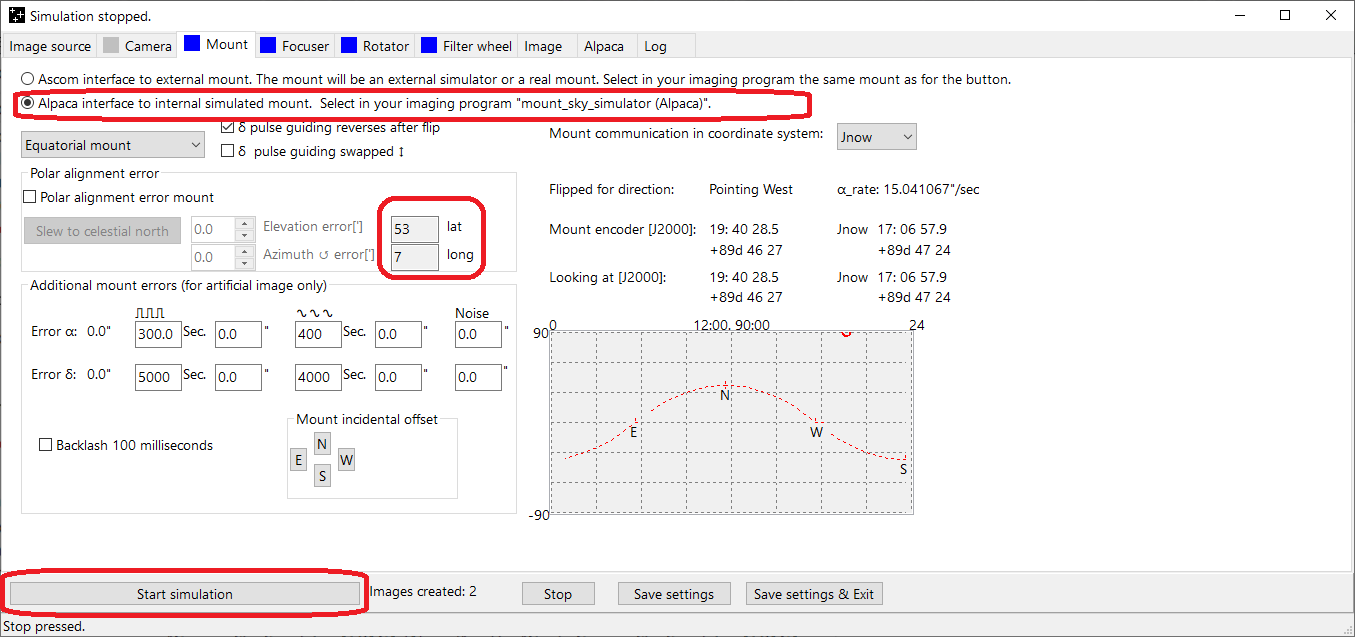
- In tab Mount, select Alpaca interface to internal mount (or select ASCOM and select the ASCOM simulator). Select later the same mount/telescope in the acquisition program
- Enter your geographic position, so latitude and longitude.
- Press "Start simulation":
- APT
- CCDCiel
- Nina
- Preparation for programs which does not support Alpaca but only ASCOM like PHD2 (Building ASCOM to ALPACA bridge)
- Back to index
APT
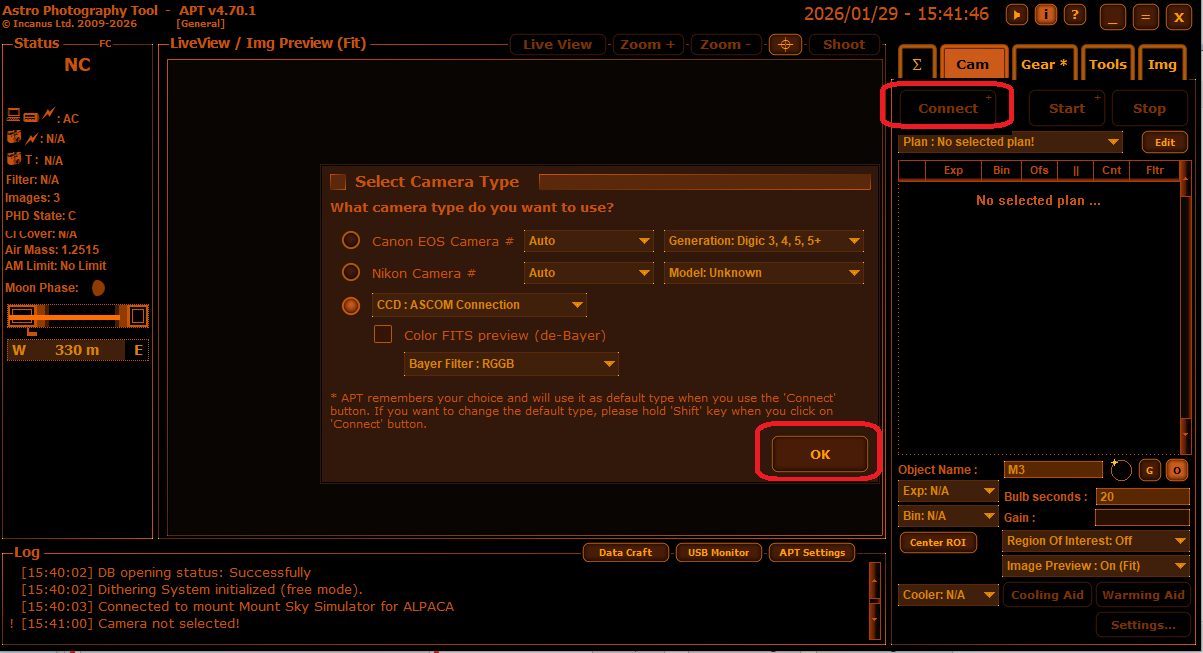
First setup the simulator and start the simulation as described here
Start APT and press shift + Connect button.
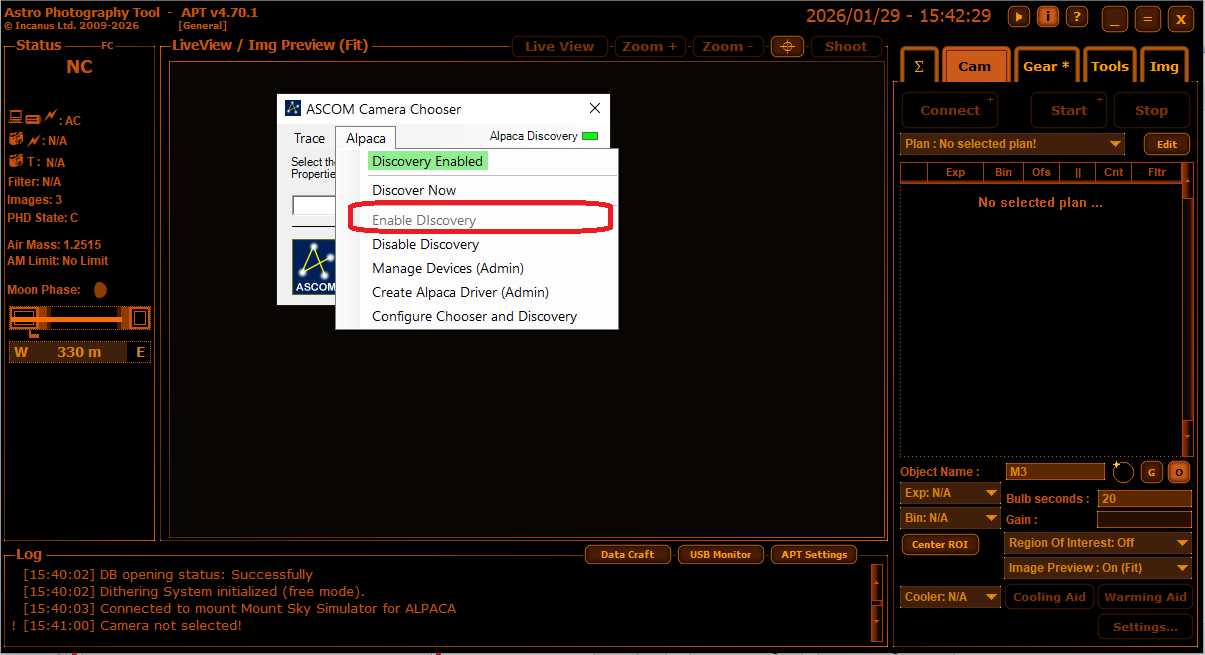
In the ASCOM Camera Chooser enable discovery for ALPACA:
Select the Camera Sky Simulator for ALPACA
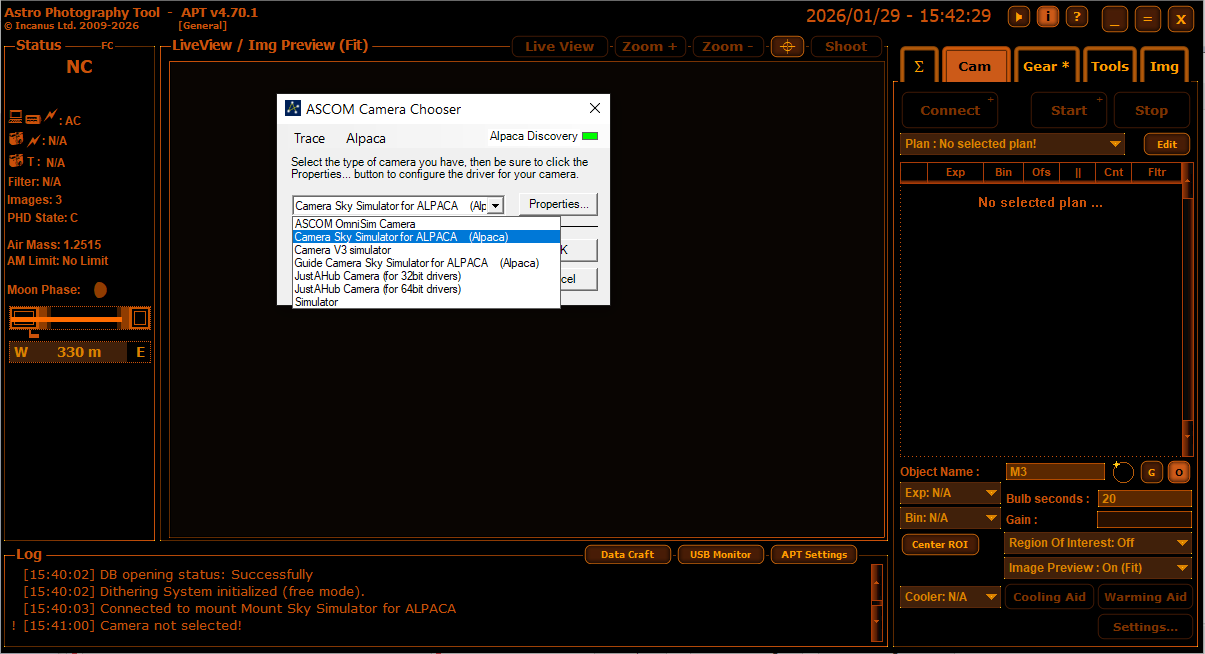
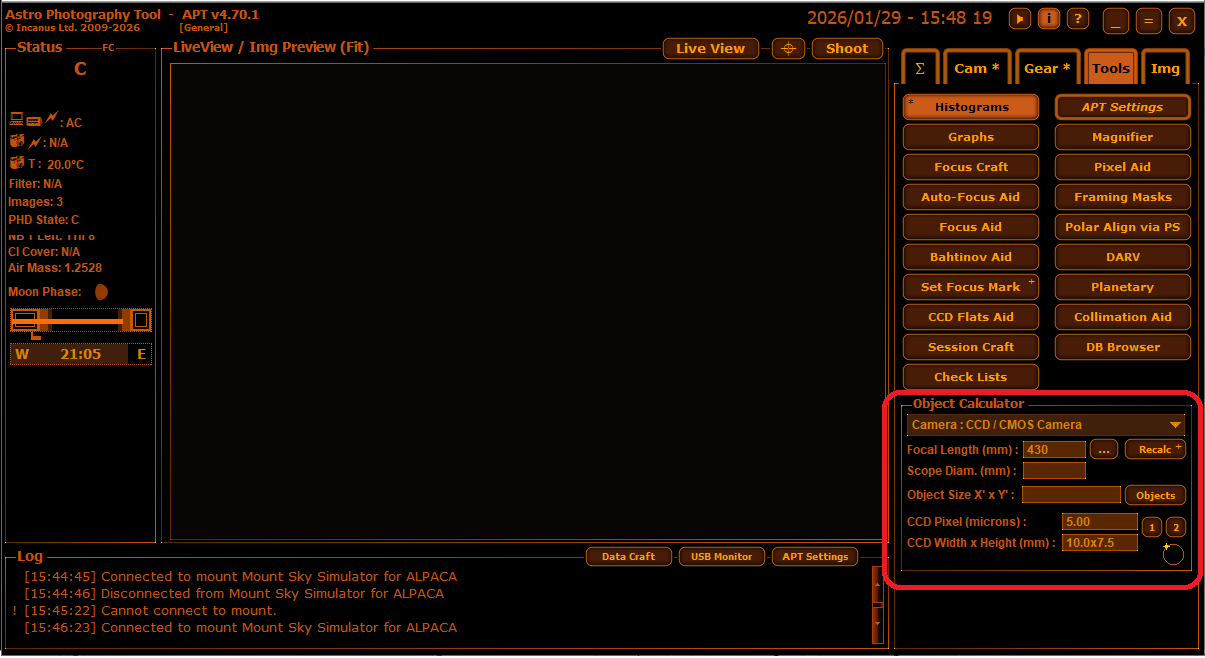
Specifiy the same focal length and pixel size as in the Simulator.
- Connect all equipment
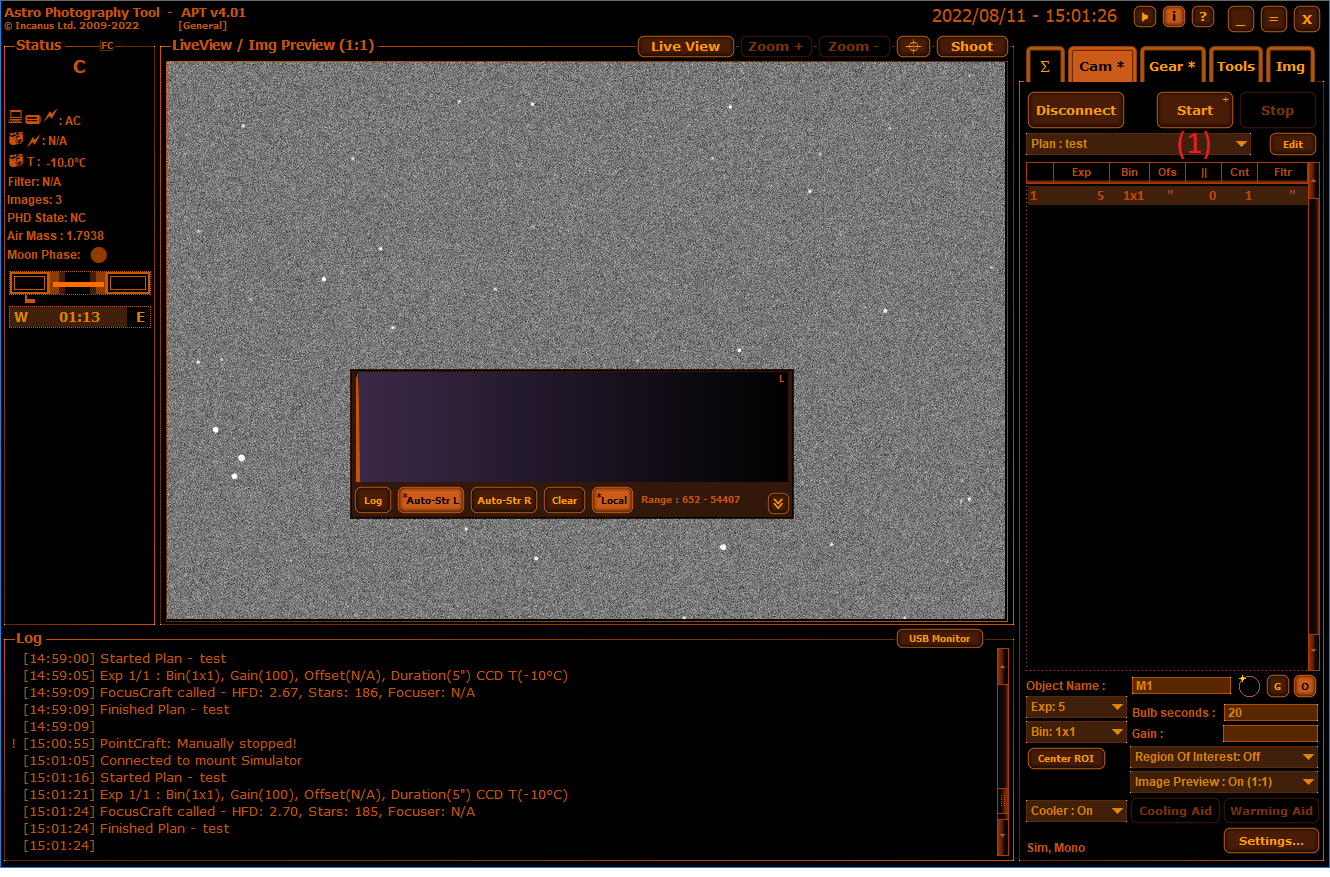
- Set the binning in the Plan at 1x1
- Take an image of 5 seconds or more.
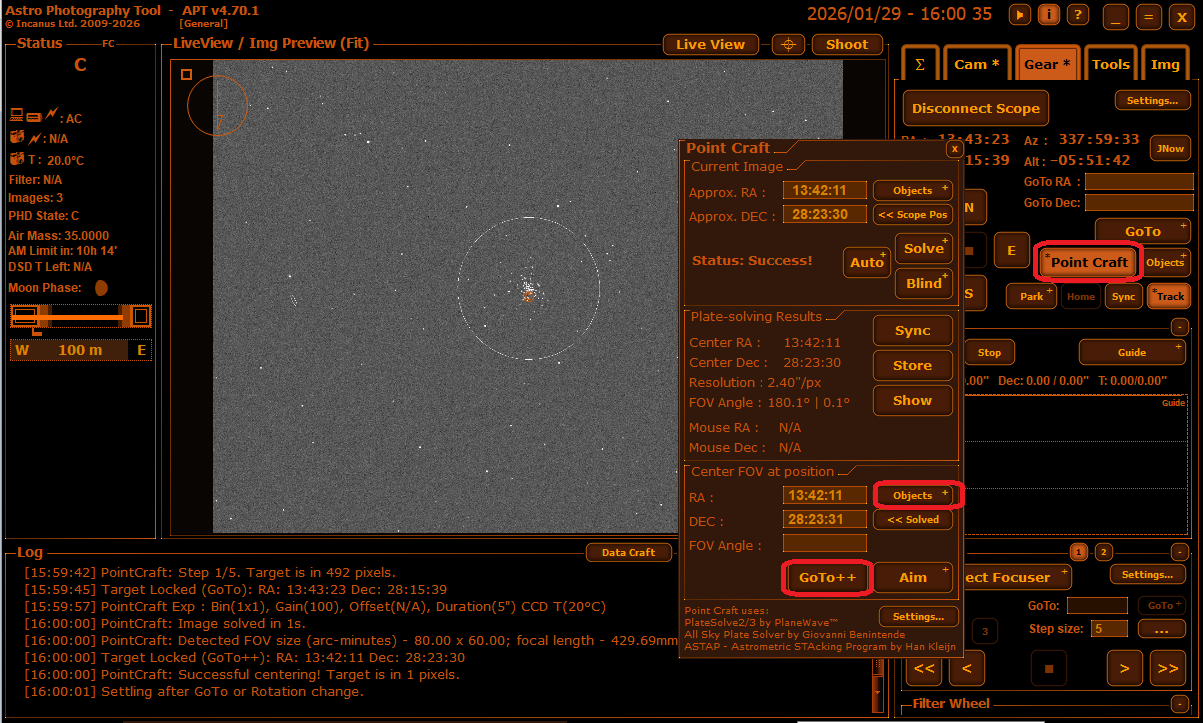
Press Pointcraft, Pointcraft setting and install and specify ASTAP as solver and blind solver.
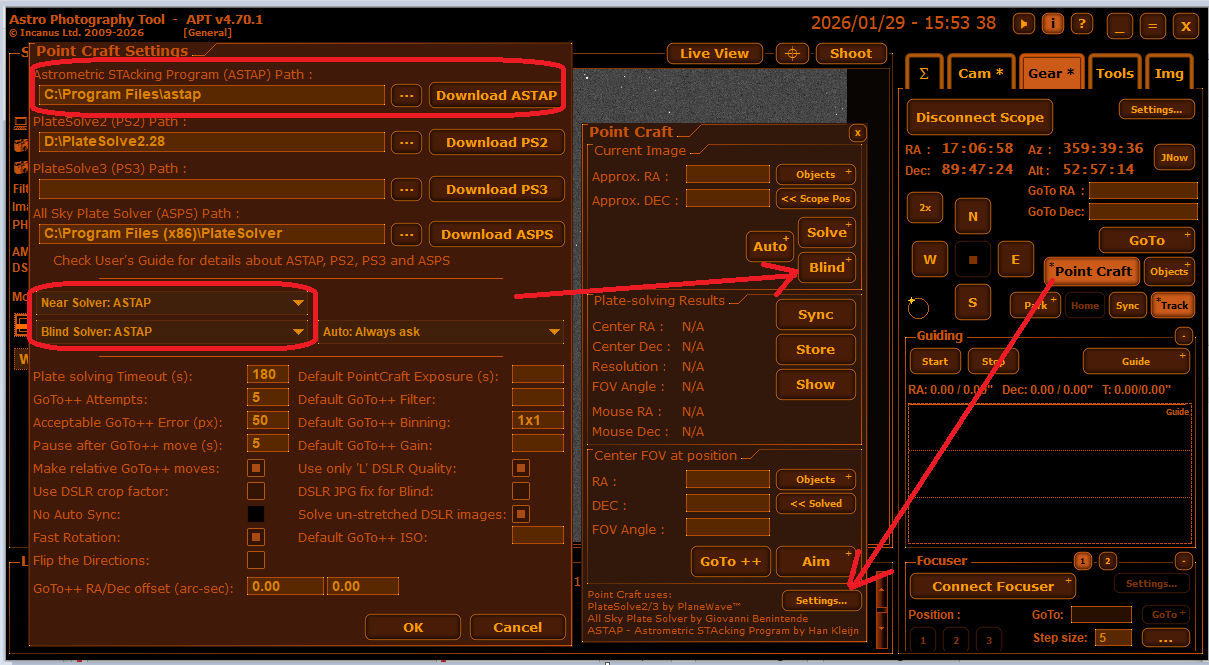
Try blind solve.
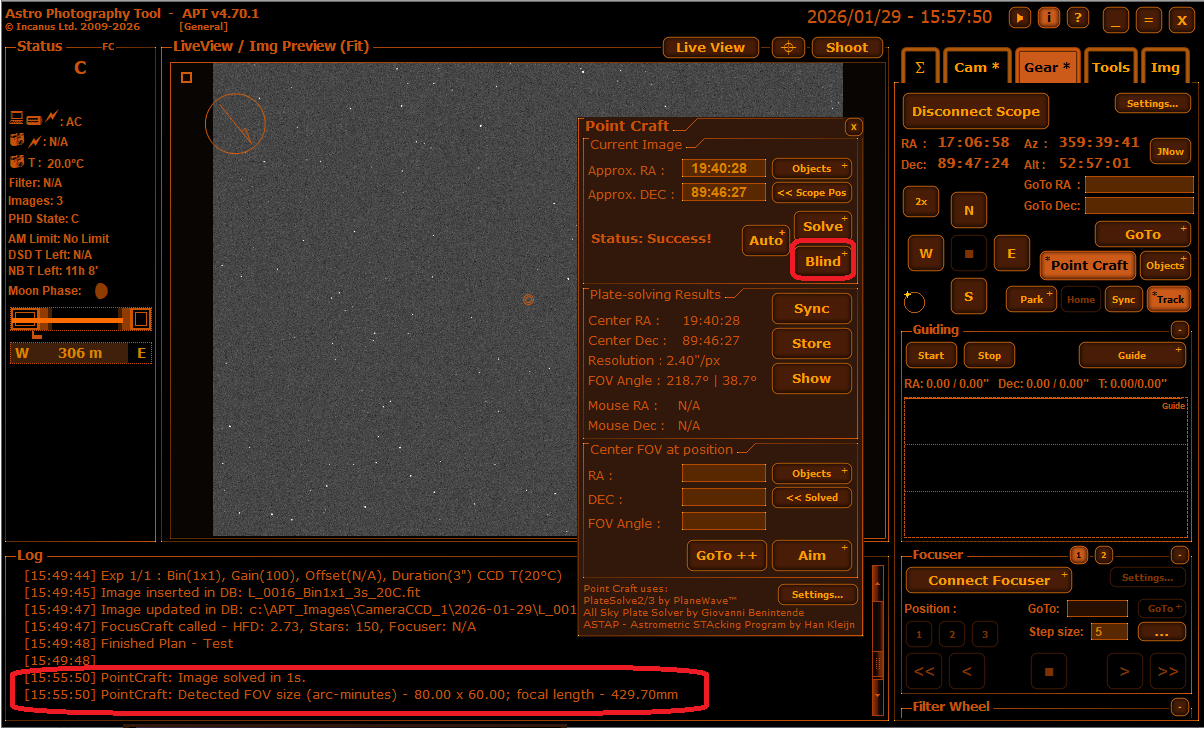
Try pointcraft , select Object, select object M1 and press GoTo.
Instruction how to setup PHD2 (Building ASCOM to ALPACA bridge)
Back to index
CCDCiel
First setup the simulator and start the simulation as described here
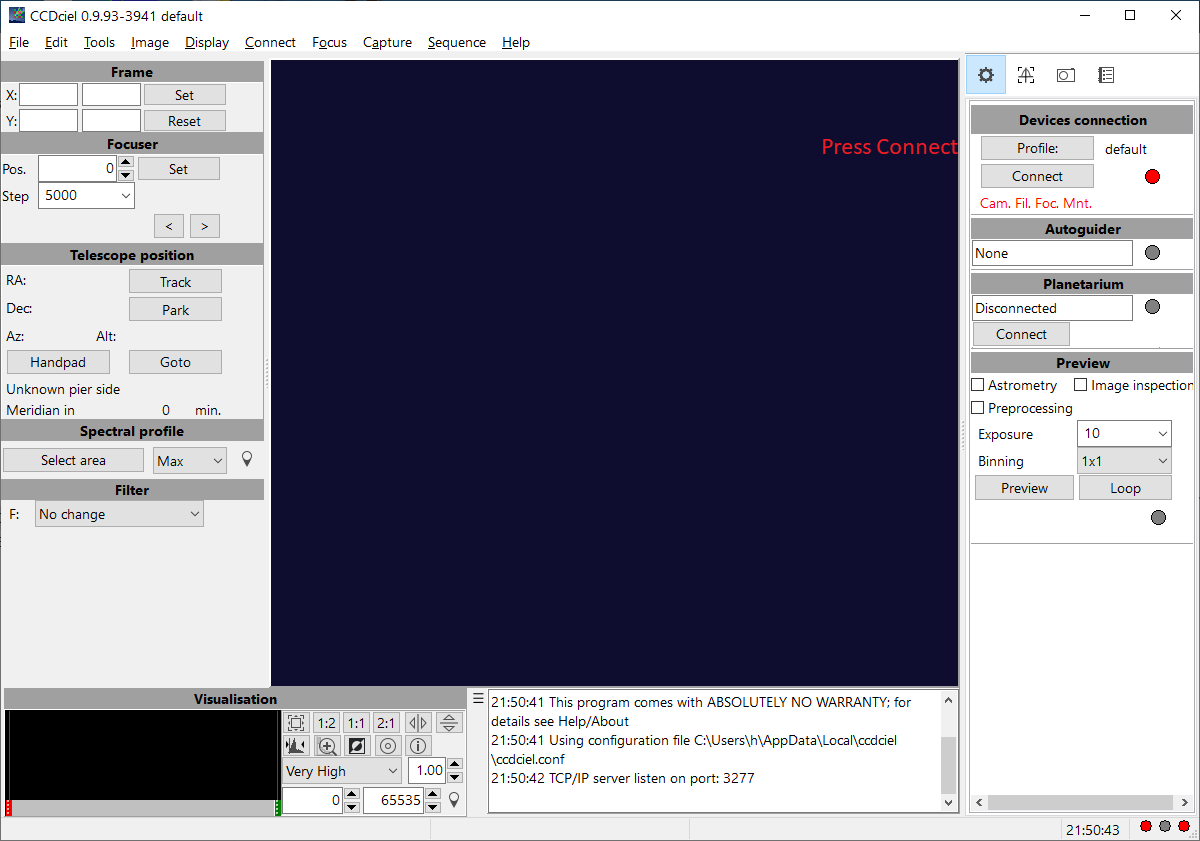
In CCDCIEL
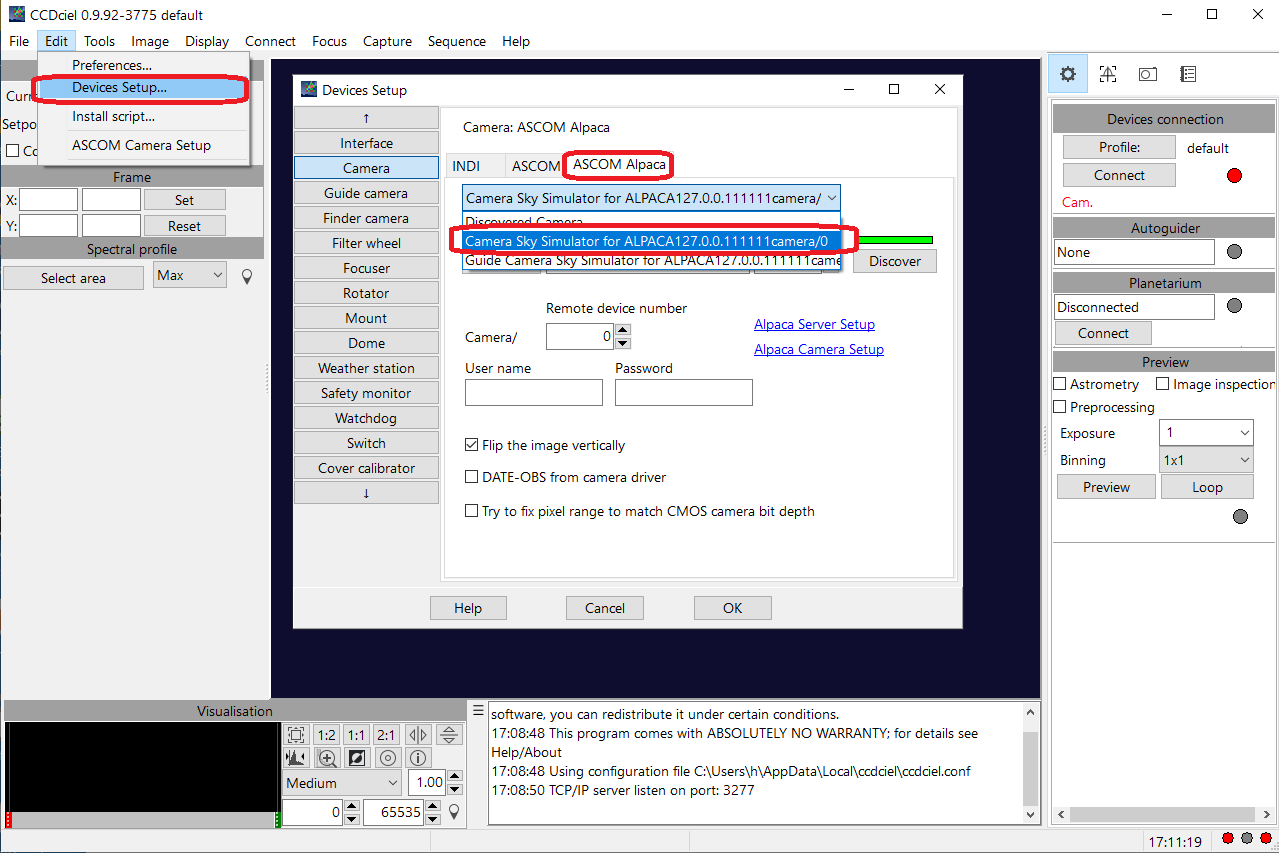
(1) Select camera "Sky Simulator (ASCOM)".
(2) In camera setup set the path to image.png. This image is the link between the sky simulator program and sky simulator camera Ascom driver.
In Edit, Devices Setup:
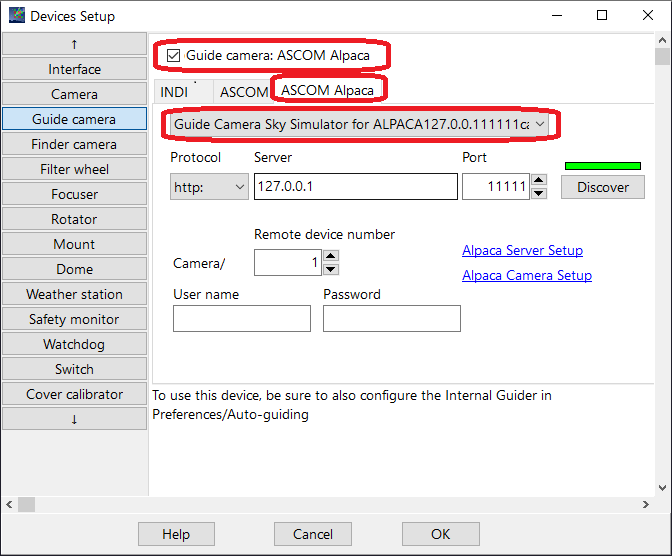
In Edit, Devices Setup, Guide Camera select the guide camera and check the checkmark to use it:
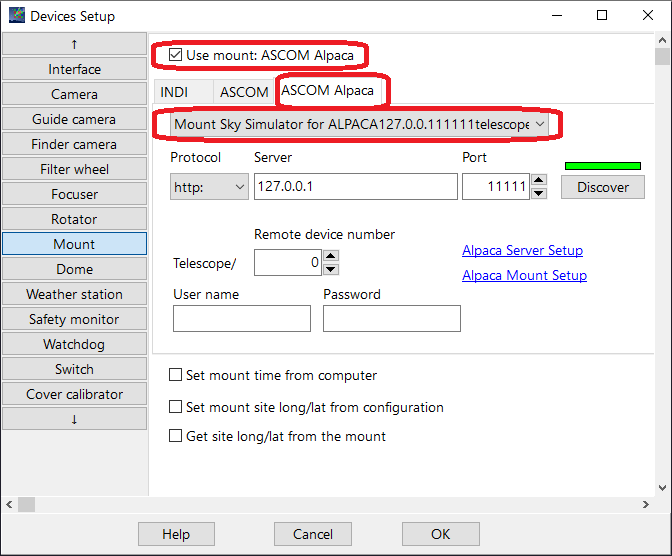
In Edit, Devices Setup, Mount, select the Mount Sky Simulator for Alpaca and check the checkmark to use it.:
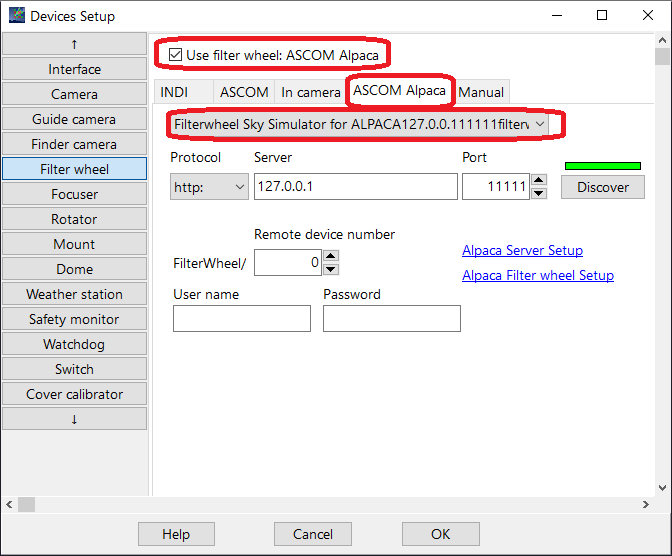
In Edit, Devices Setup, Filter Wheel:
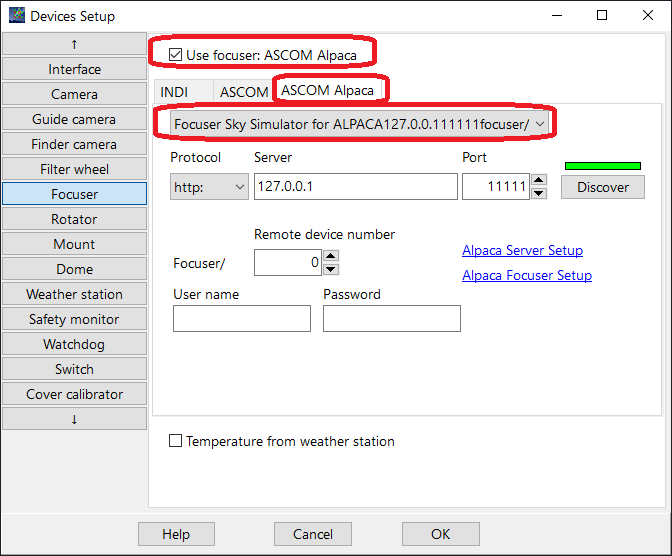
In Edit, Devices Setup, Focuser:
In menu Edit, Prefrences define pixel size:
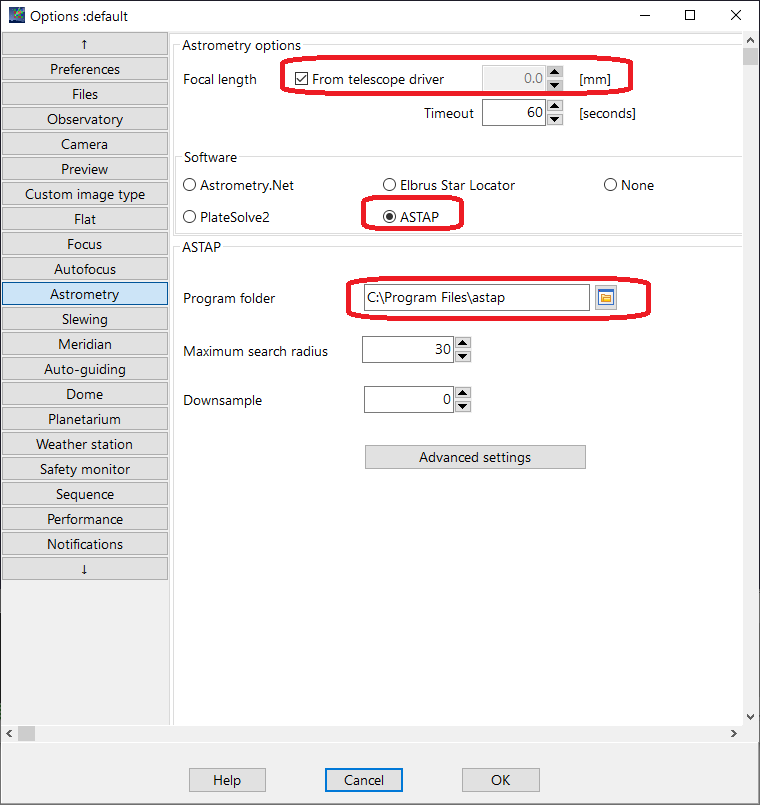
In menu Edit, Prefrences define focal length and ASTAP as solver (seperate to install program and seperate install star database):
In Sky Simulator:
- Select artificial image
- Start simulator
In CCDCiel
- Connect all equipment.
- Take a preview image of 5 seconds or more, bin 1x1
- Solve the preview image using the right mouse popup menu
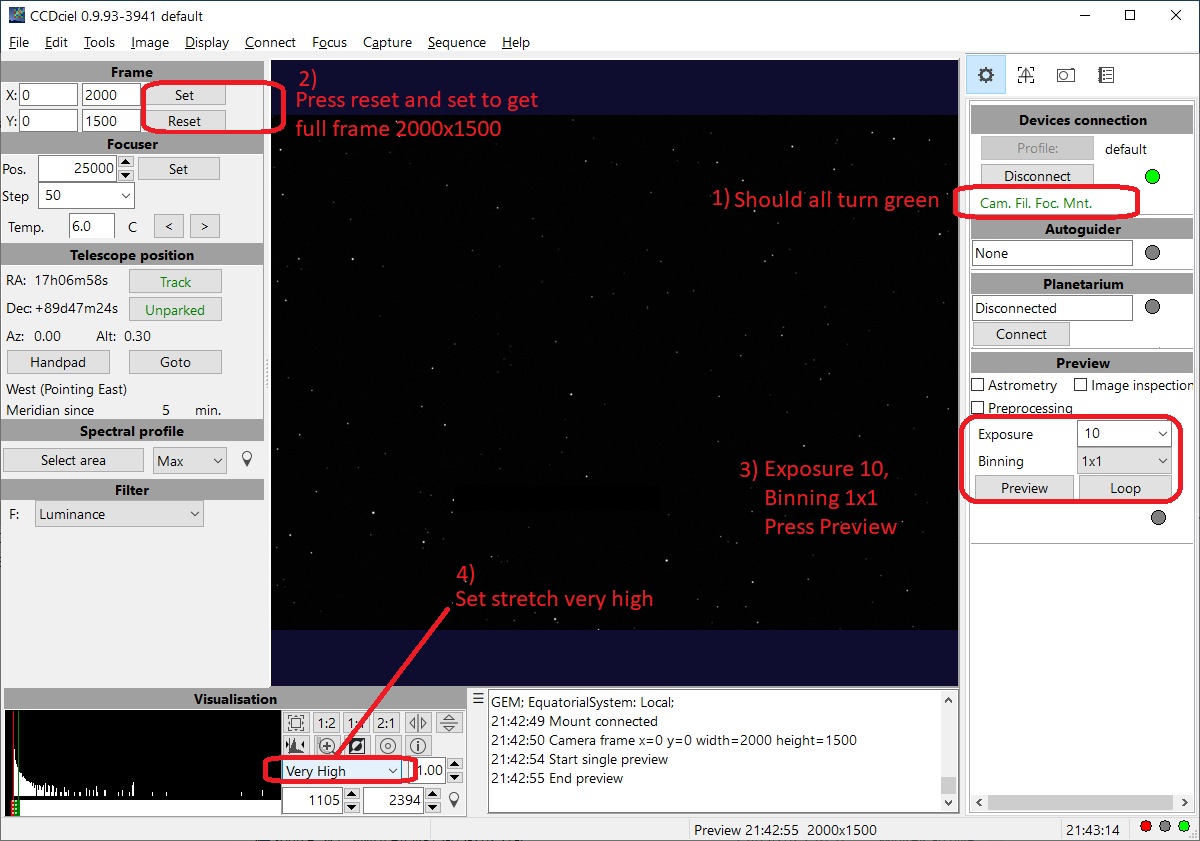
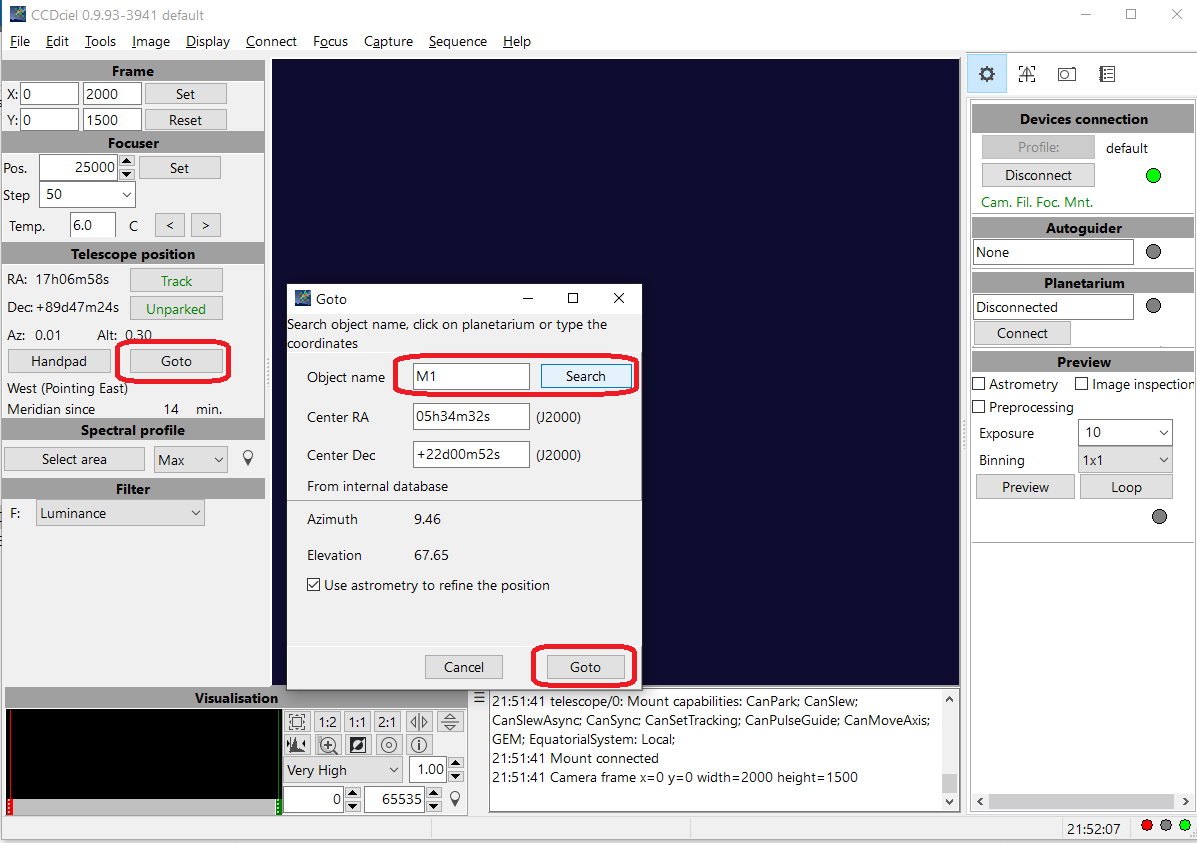
In CCDCiel try the goto function:
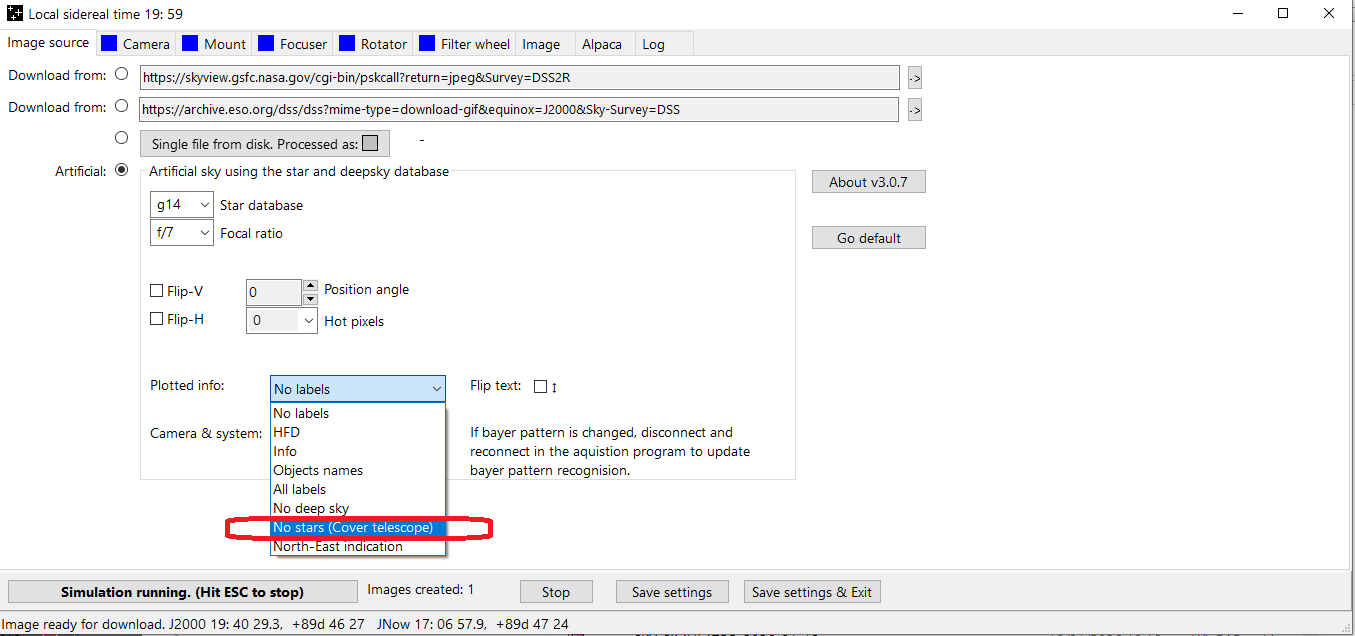
To cover the telescope for CCDCiel internal guider, select in tab Image source for plotted info "No star (Cover telescope)":
Back to index
Nina
First setup the simulator and start the simulation as described here
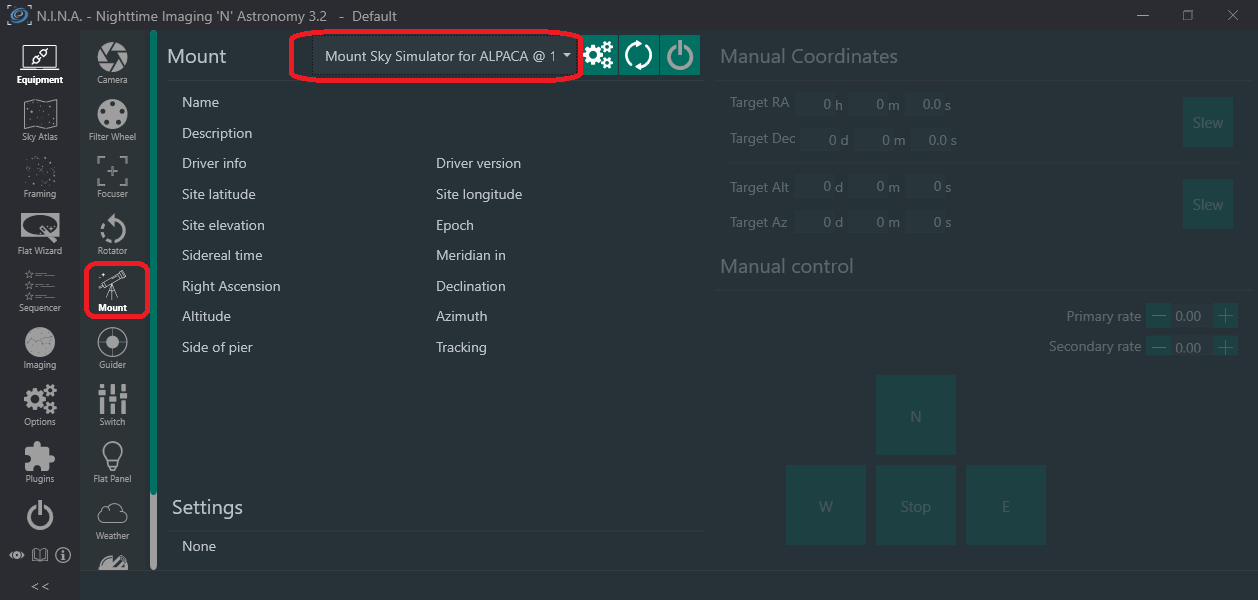
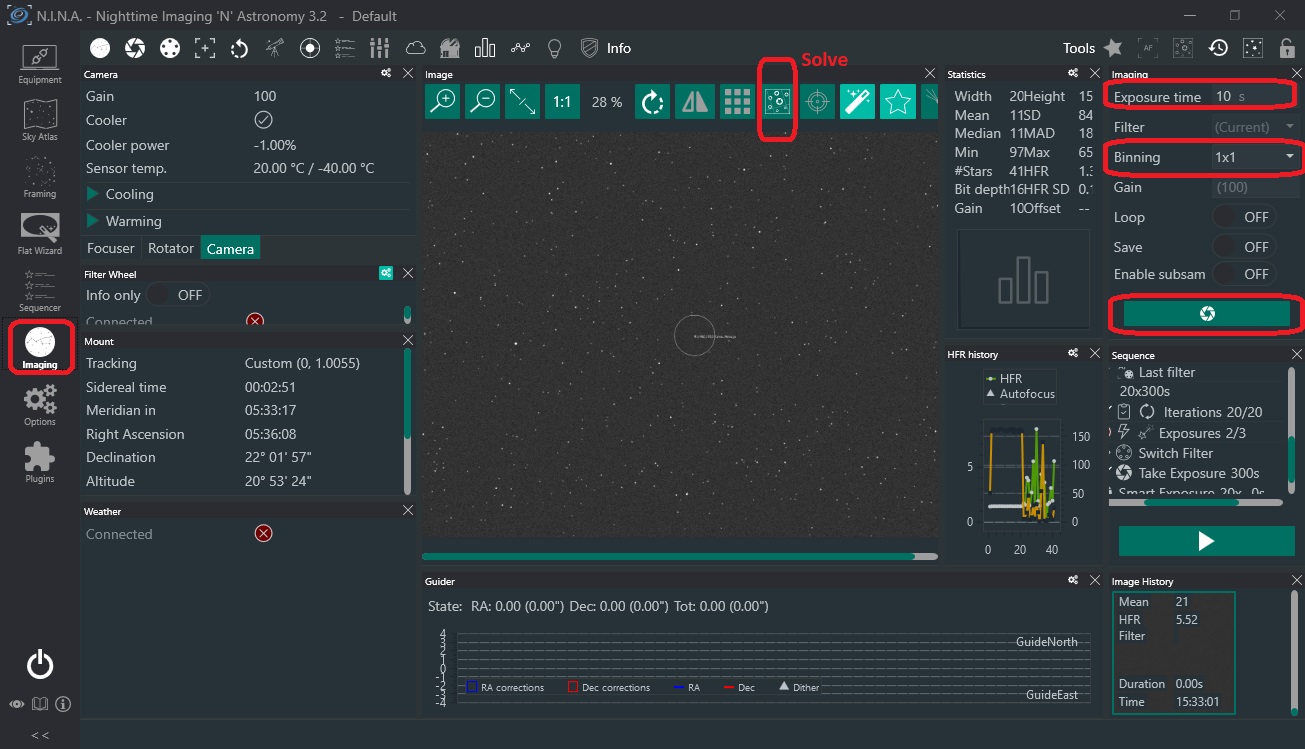
In Nina Select "Camera Sky simulator for Alpaca".
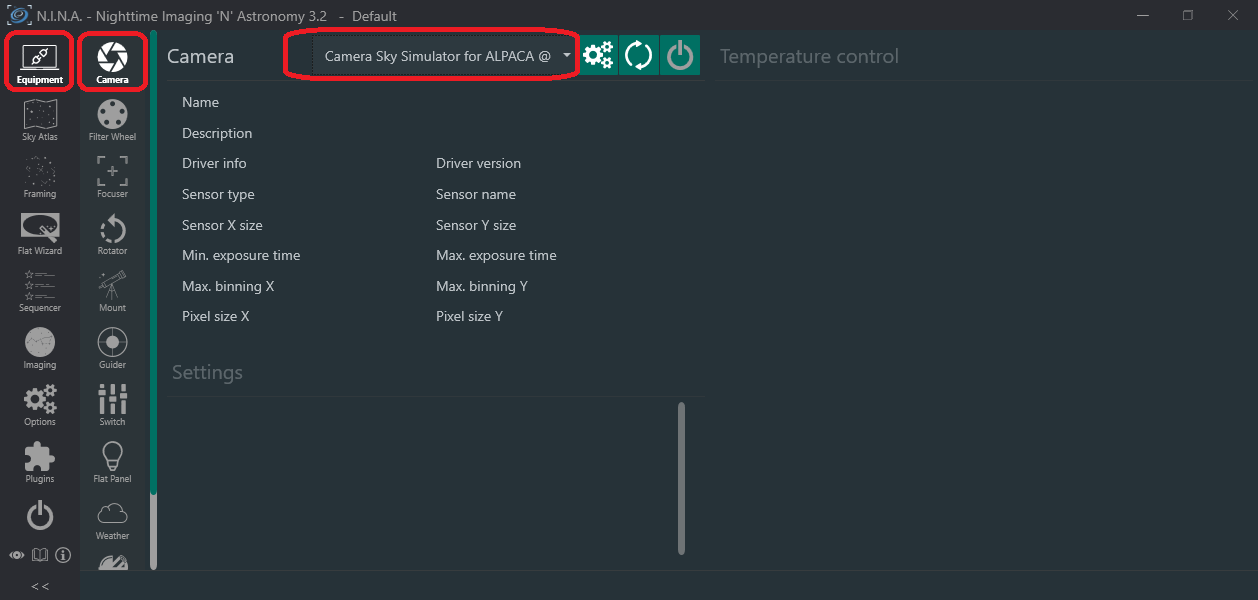
Select mount : "Mount Sky simulator for ALPACA"
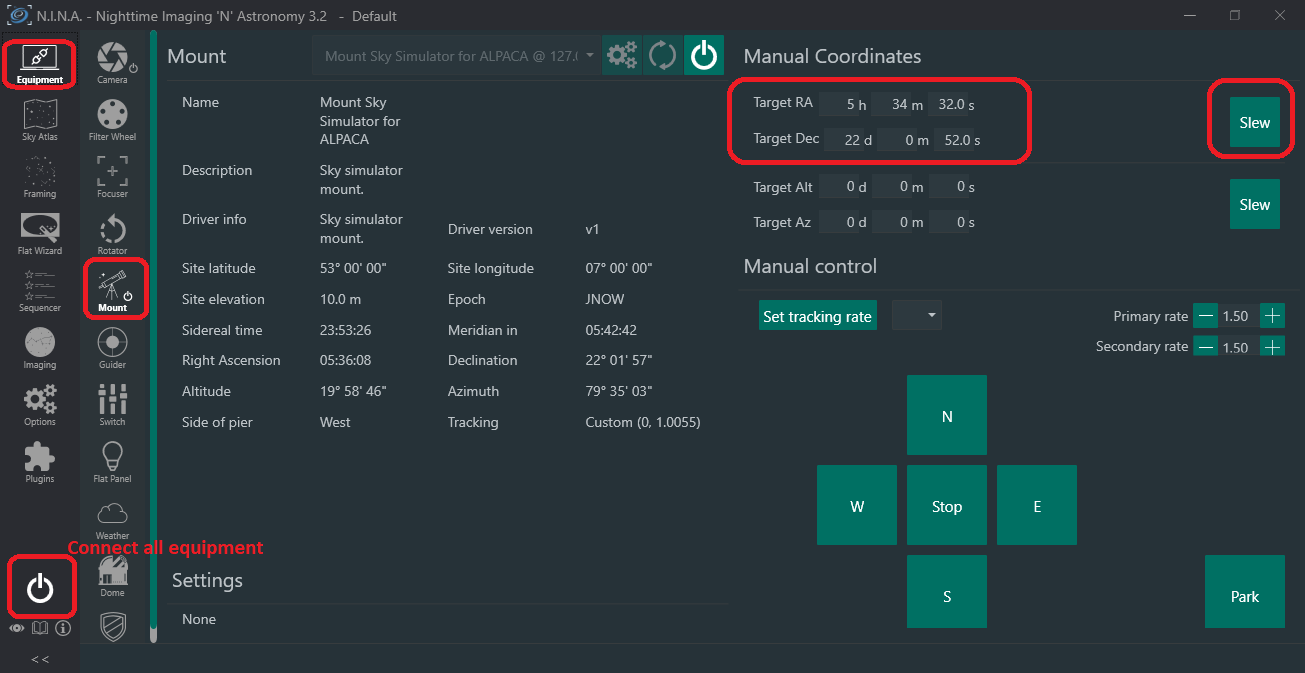
Press connect equipment
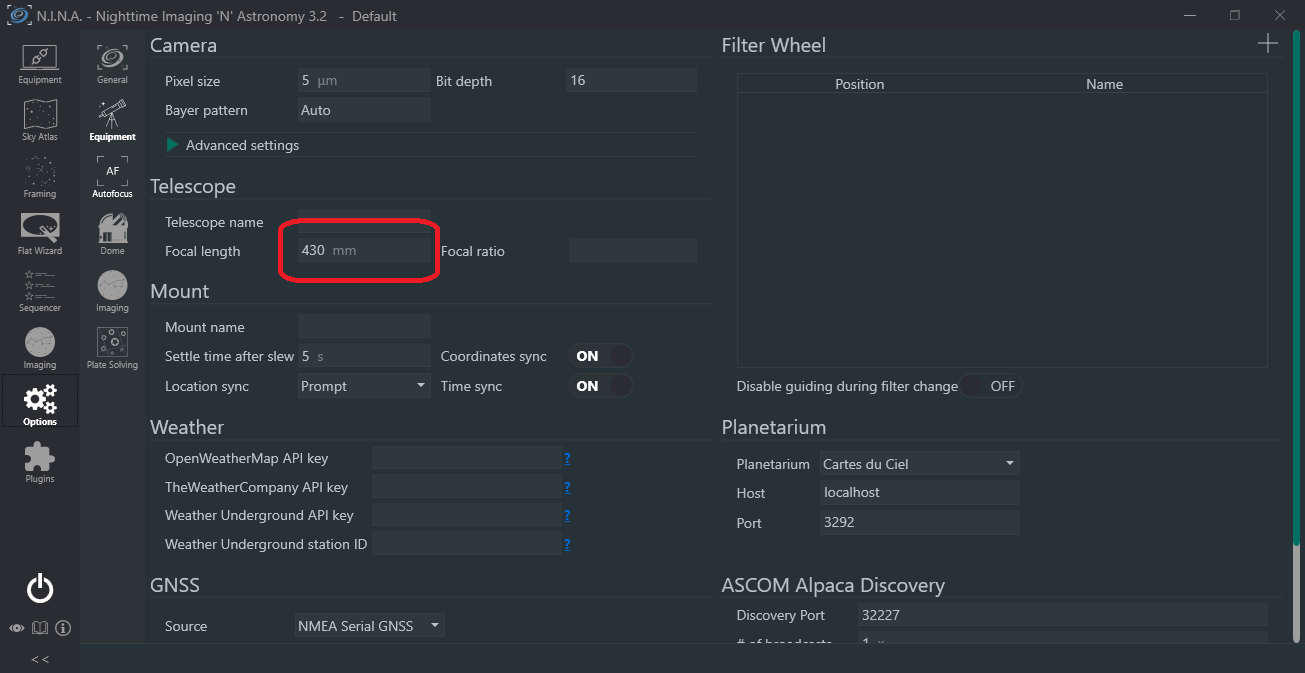
Specify the focal length of the telescope, same as in simulator. Check pixel size read from simulator:
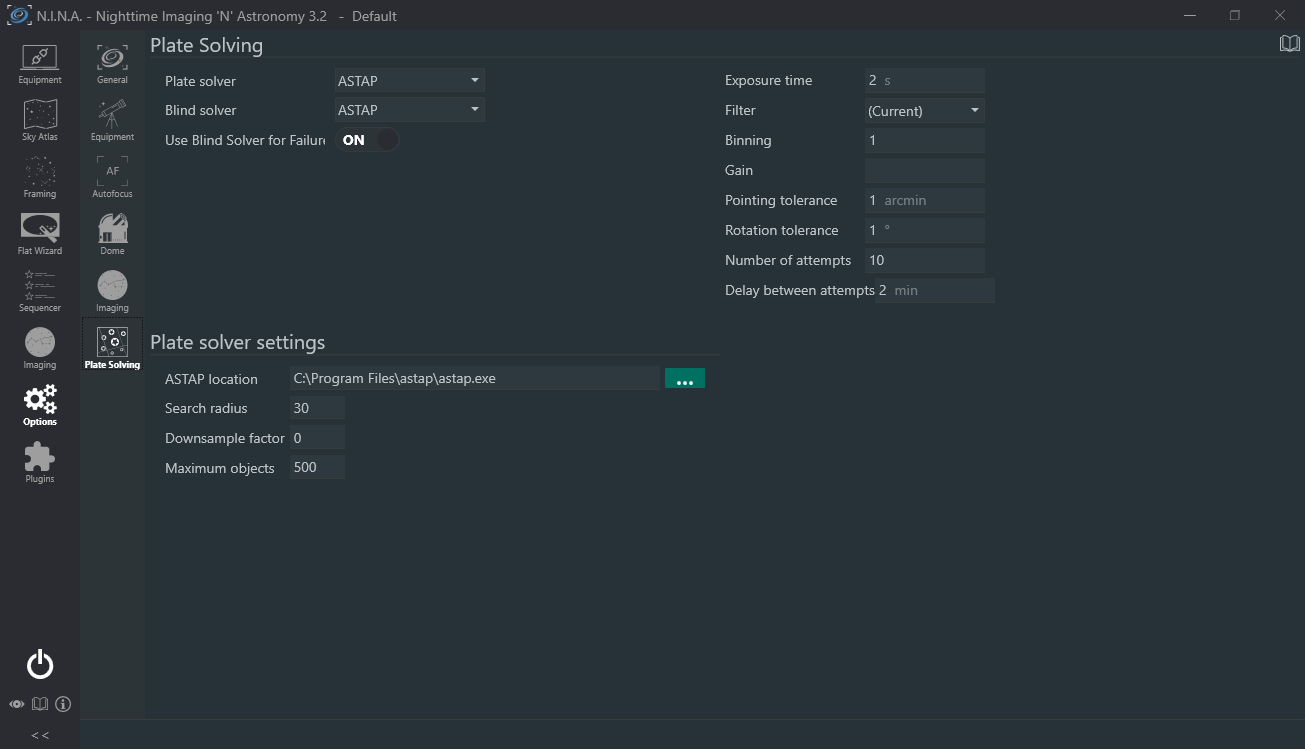
Install solver like ASTAP and check settings:
Connect all equipment.
Set a target position like for M1. Press slew
Set binning of camera to 1x1 (recommended for simulation).
Take an image of 10 seconds.
Solve the image using the solve button
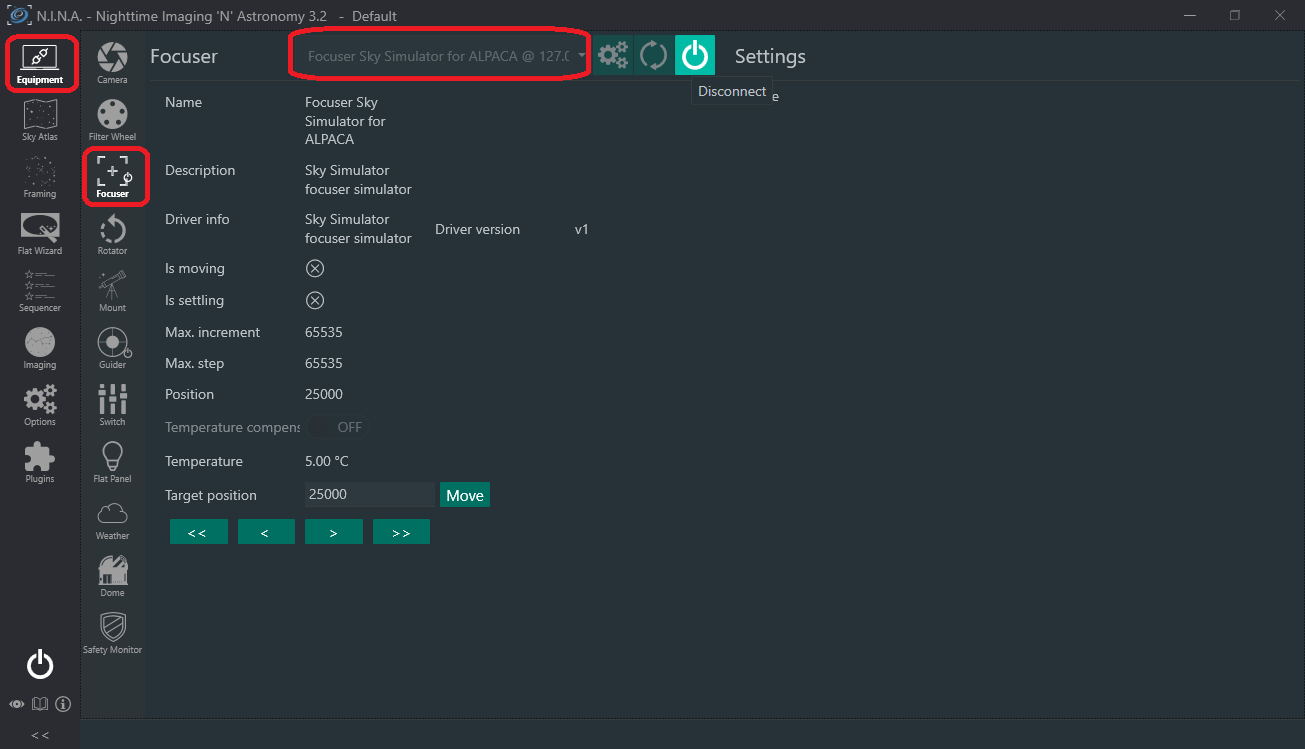
You could select some more equipment like the focuser:
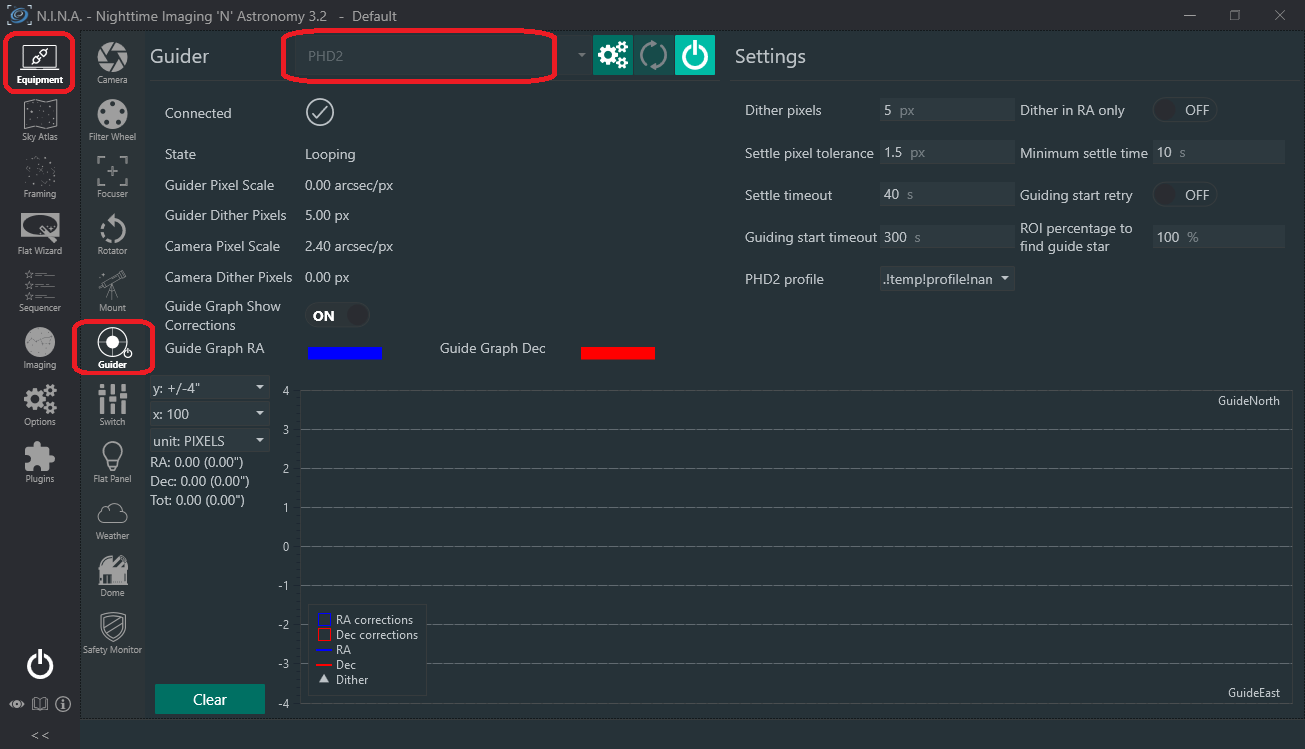
PHD2 as guider.
Instructions for settting up the simulator for PHD2
Back to index
Preparation for PH2 which does not support Alpaca (Building ASCOM to ALPACA bridge)
Since PHD2 can not access Alpaca devices, you have to build a bridge between ASCOM and ALPCA
Start the simulation with mount and camera in mode ALPACA
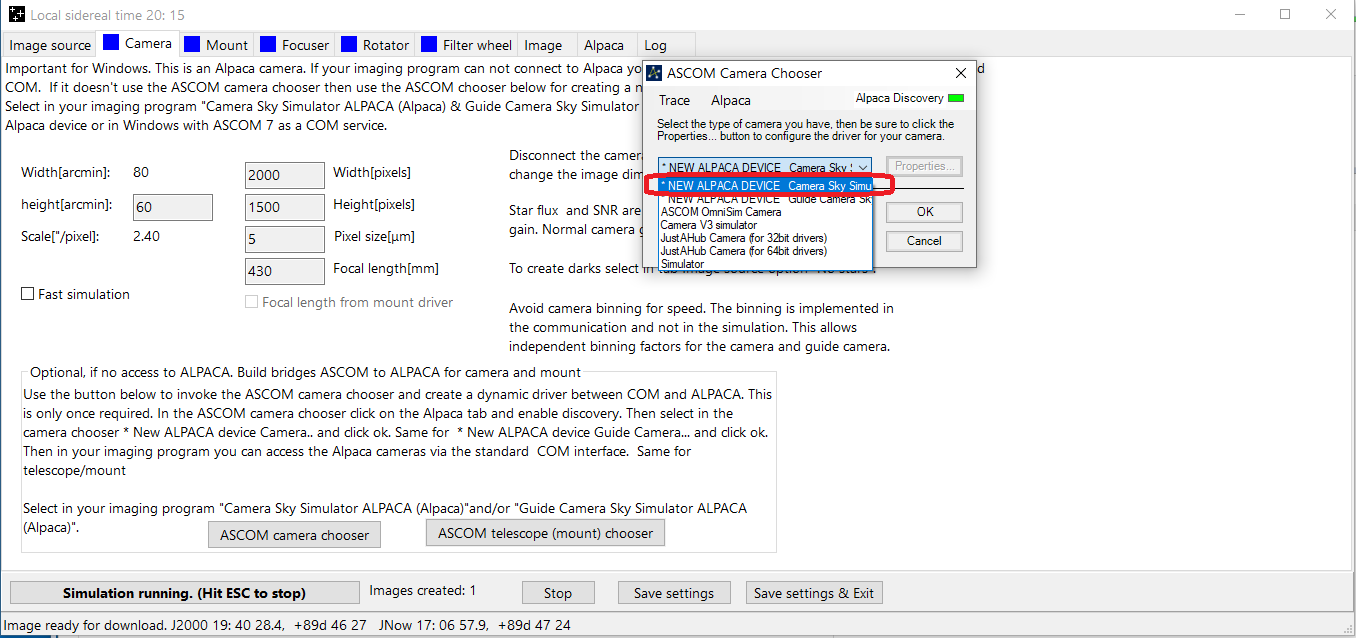
In tab Camera, click on button ASCOM camera chooser, click on pull down menu Alpaca and enable discovery:
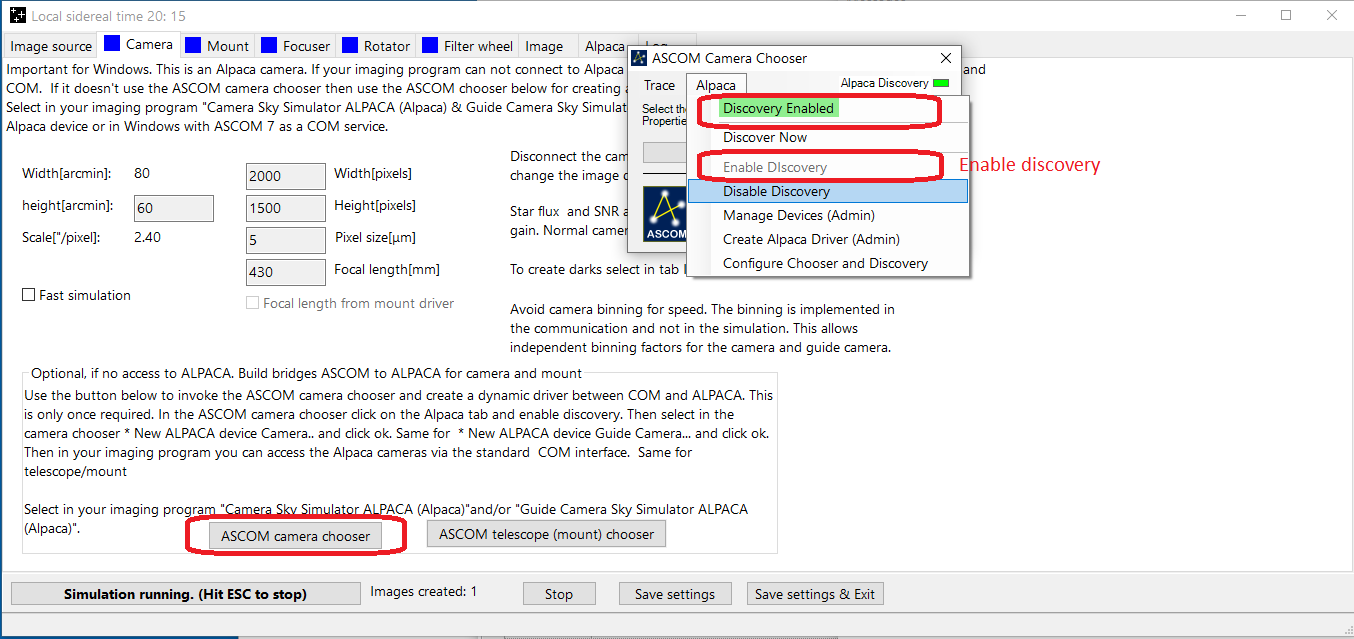
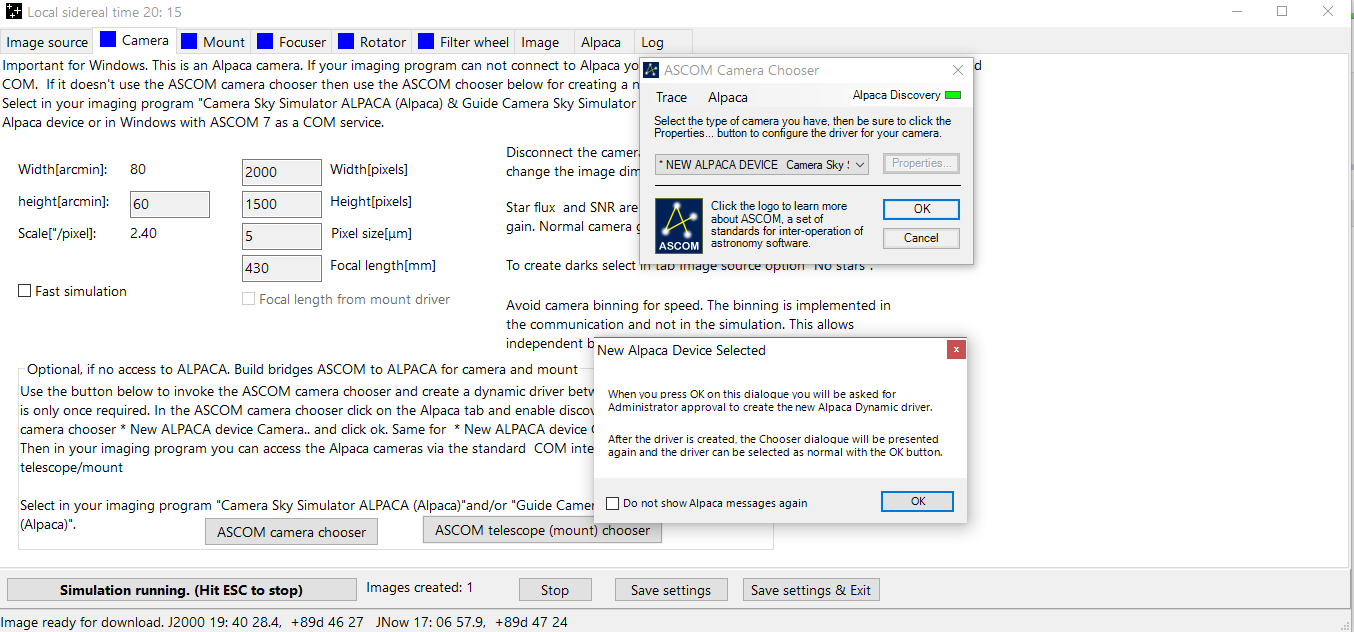
Select NEW ALPACA DEVICE Camera Sky Simulator. This is not required for PHD2. Just optional
Complete the process by clicking OK and OK.
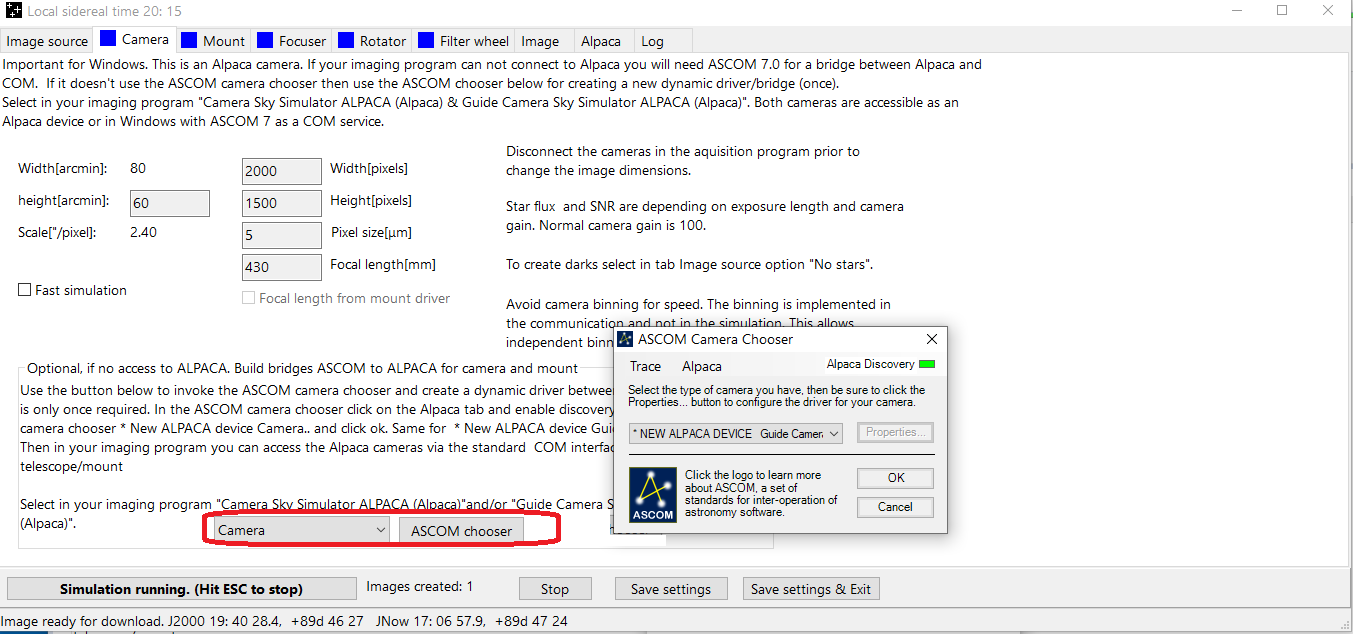
Do the same for the Guide Camera Sky Simulator:
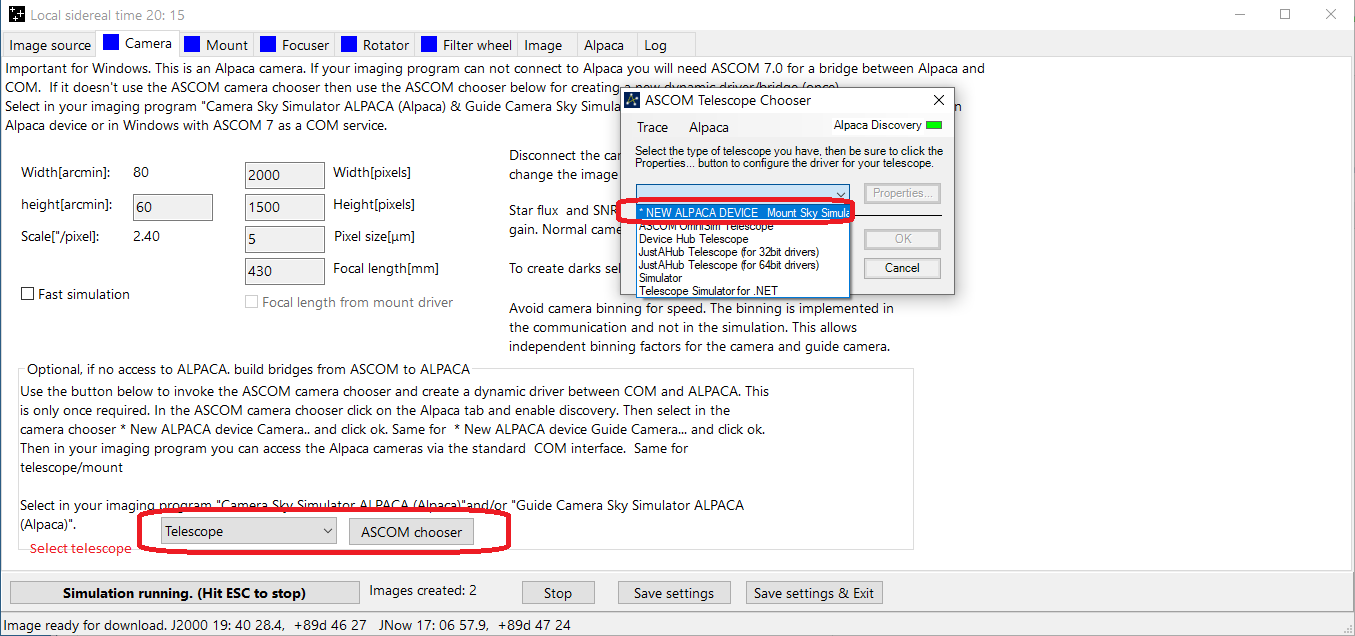
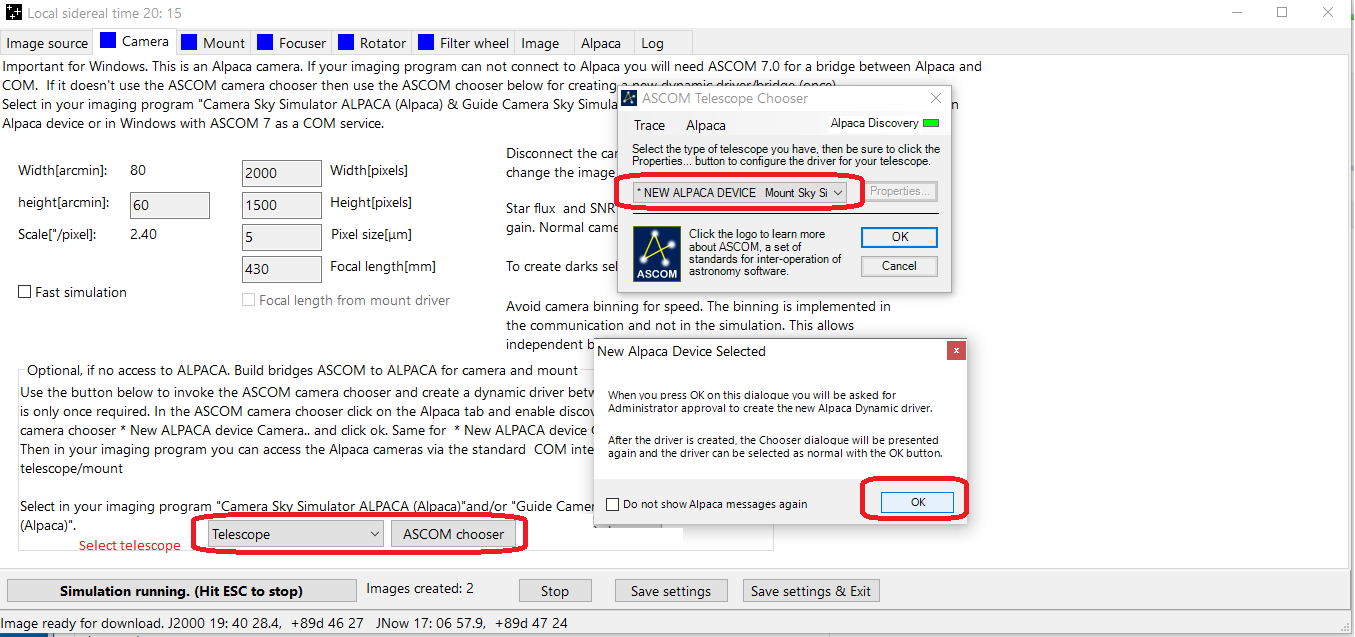
Then build a bridge for the mount. Press the button ASCOM telescope (mount) chooser.
Enable discovery.

Select NEW ALPACA DEVICE Mount Sky simulator:
Complete the process with ok, ok:
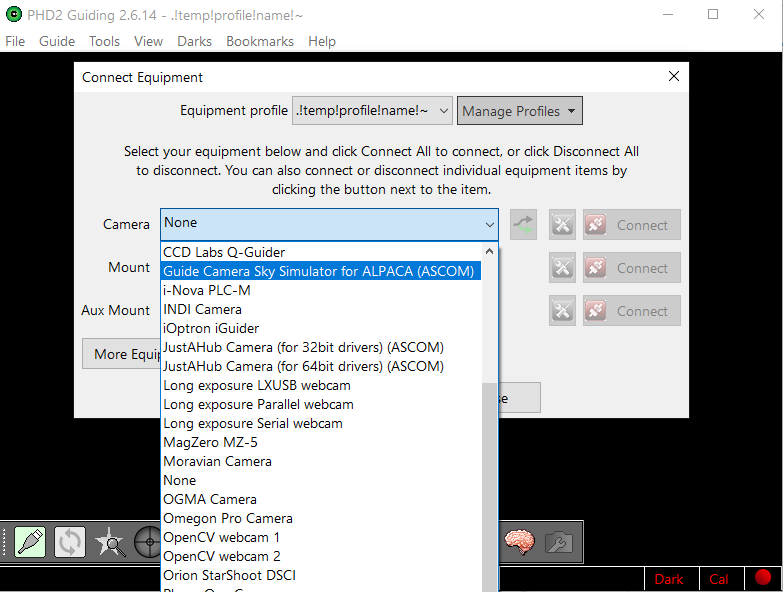
Now you can select the guide camera in PHD2 as an ASCOM device:
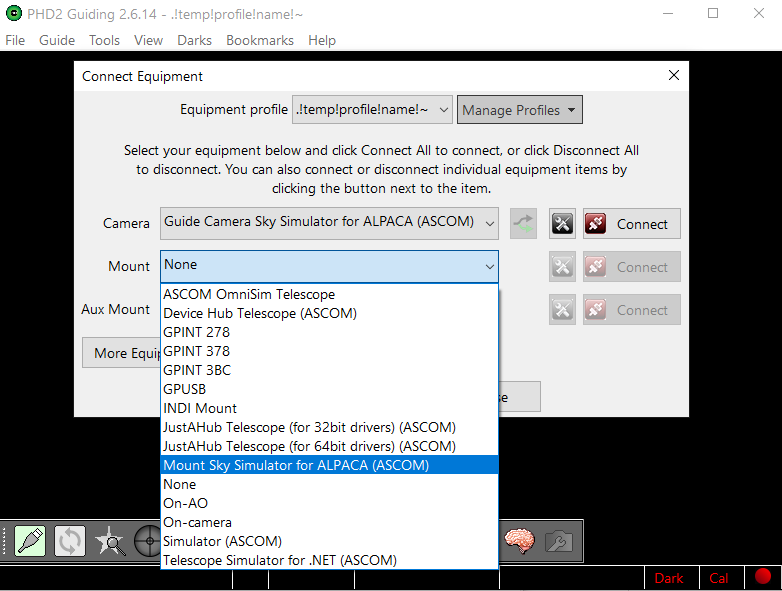
In PHD2, select the Mount Sky Simulator:
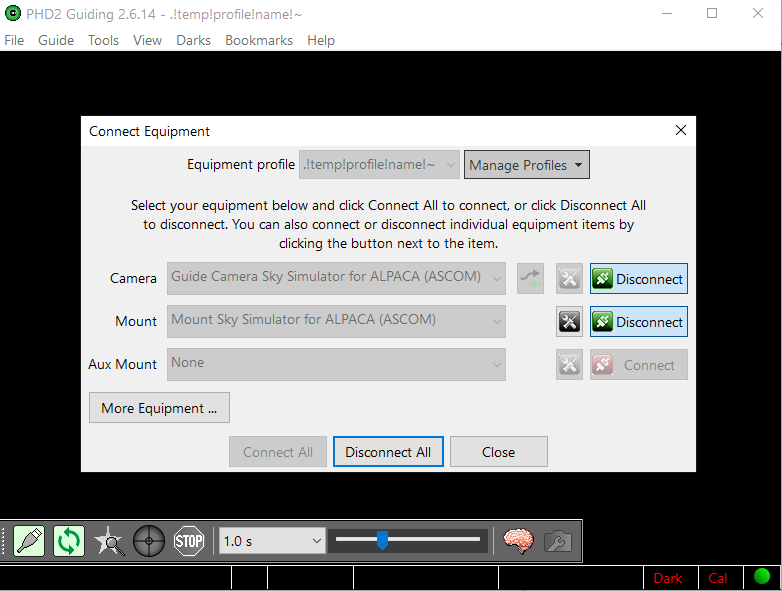
Check if both the cameras and mount are connected
Start looping in PHD2 and check if the artificial image is shown:

The focal length of the guide telescope and main telescope are in the simulator the same. The same image is used both cameras.
To cover the telescope for PHD2 calibration select in tab Image source for plotted info "No star (Cover telescope)":
Back to index
This page: https://sky-simulator.sourceforge.io/
Feedback, comments contact: this forum or email